FIELD NOTES / SK200-10 & GM38 FINAL DRIVE / COUPLING SPLINE & GEAR OIL
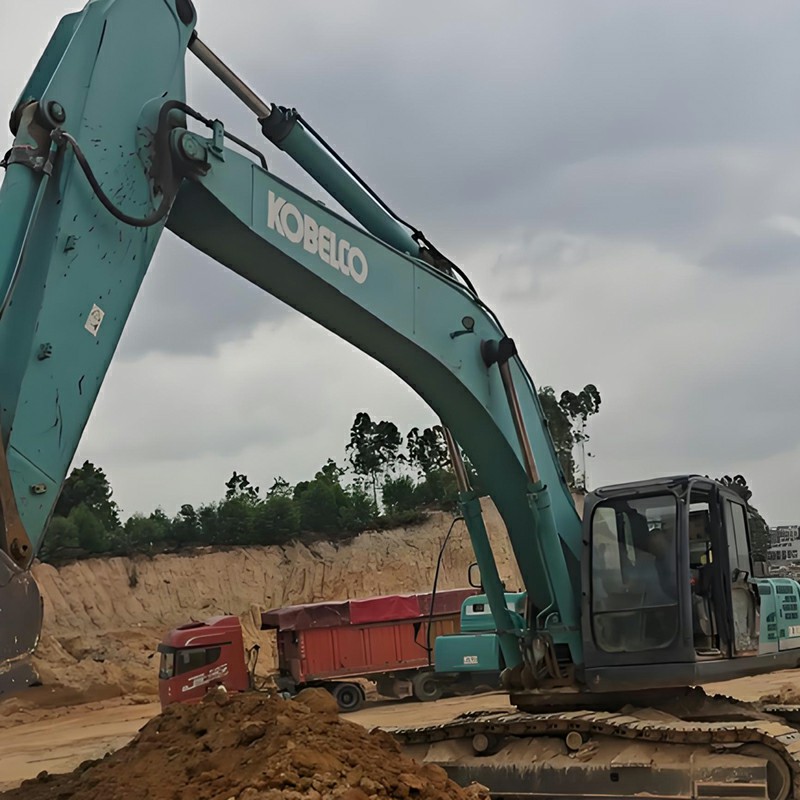
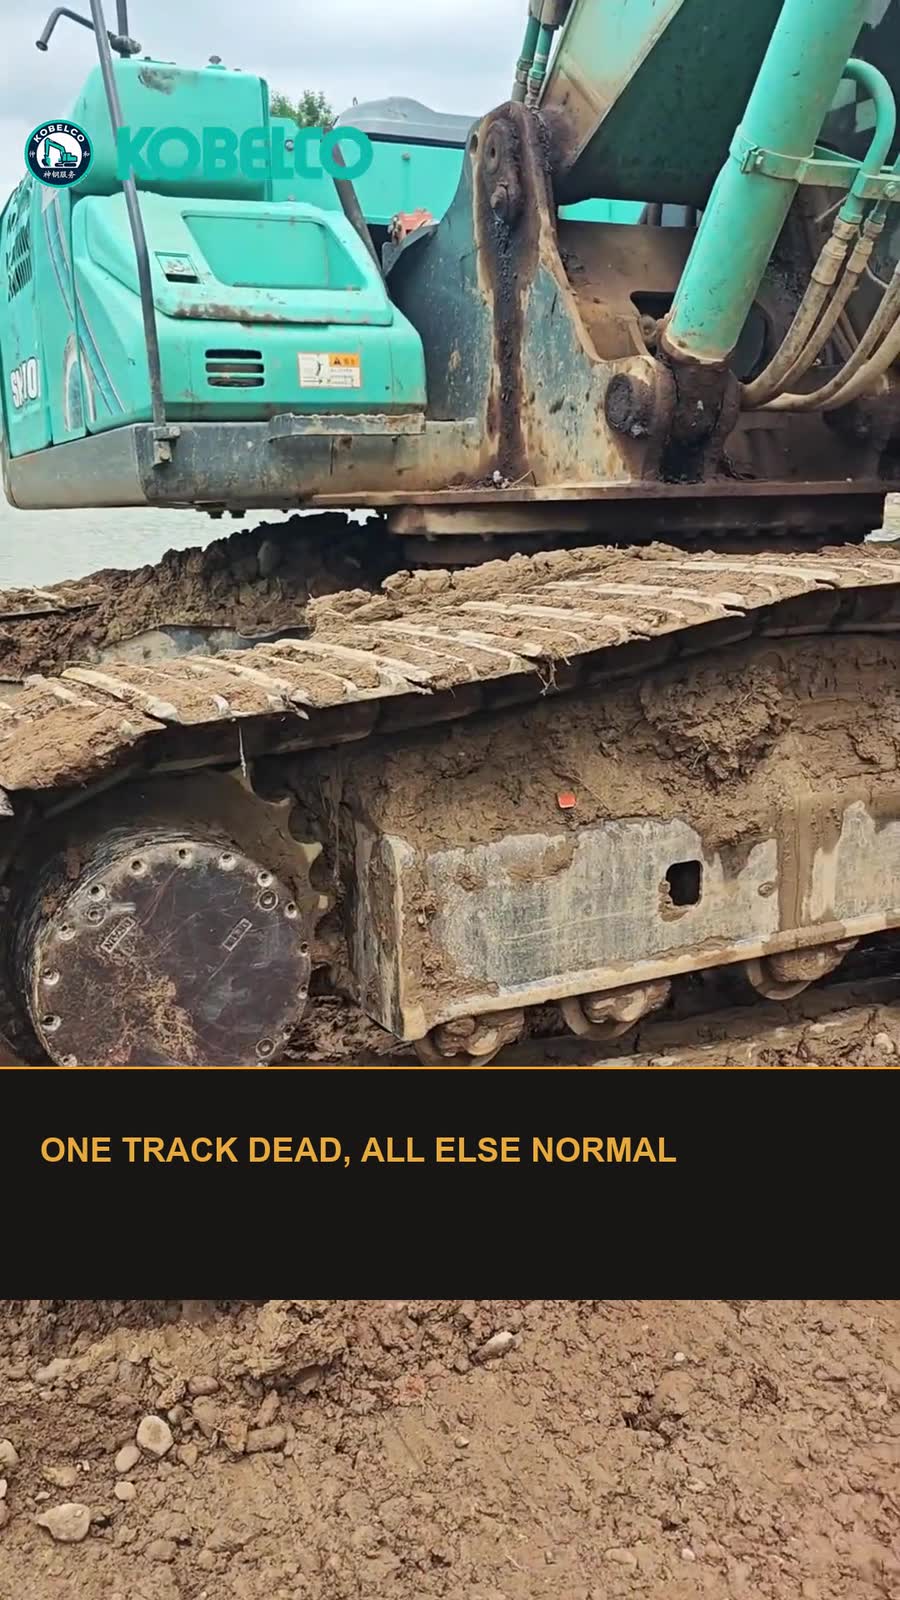
An SK200-10 with 14,500 hours on the meter came in with a dead right track. Boom, arm, bucket, swing and the left track all worked normally. Only the right side refused to move. The owner had already asked for a price on a complete travel motor, because a track that does nothing looks like a motor that has failed.
It was not the motor. The motor was turning freely. The track was standing still. That one observation moves the fault out of the hydraulic system entirely and into the short mechanical path between the motor shaft and the sprocket. Finding it took a drain plug, a look inside the reduction housing and one worn coupling. The motor assembly stayed on the machine.
This guide follows that same order of checks, so you can run them on your own machine before ordering anything expensive. It applies to Kobelco excavators fitted with the GM38 final drive, a unit shared across SK200-8, SK210-8, SK200-10 and SK210-10. The drive family is common; the part numbers are not. Confirm every number by model, serial number and side before you order.
On this page
The symptom, in full
Write down the exact complaint before you touch a wrench. This one was unusually clean:
Right track dead, in both directions.
Left track normal.
Every upper-structure function normal.
No change in engine sound when the right travel lever was pulled.
Machine at 14,500 hours, still in daily work.
A fault shared by the whole machine does not behave like this. If pilot pressure or the main pump were the problem, you would see other functions suffer too. If the machine pulled to one side but still travelled, you would be looking at a different problem — the travel deviation guide covers that case. If both tracks were slow or weak rather than one being completely dead, start with travel weakness. Here the machine simply will not move on one side.
First test: is the motor turning while the track stays still?
This is the whole diagnosis in one step, and it costs nothing but a few minutes.
1. Park on level, firm ground, lower the attachment to the ground and stop the engine. Chock the machine and keep everyone clear of the raised side. 2. Lift one track clear of the ground using the boom and arm, with the machine supported so it cannot settle. 3. Restart, set low idle, and move the suspect travel lever a short stroke in each direction. 4. Watch the motor housing and the sprocket at the same time. Have a second person observe from a safe position, or watch the drive side from a distance.

Two outcomes matter:
The motor turns, the sprocket does not. Oil is reaching the motor and the motor is rotating. The hydraulic side has done its job. Power is being lost between the motor shaft and the sprocket — inside the reduction unit. Keep going with this guide.
The motor does not turn at all. The break is upstream. Stop here and work the hydraulic side: travel deviation troubleshooting, travel weakness checks, oil pressure diagnosis and, on a -10 machine, the fault code and sensor location guide.
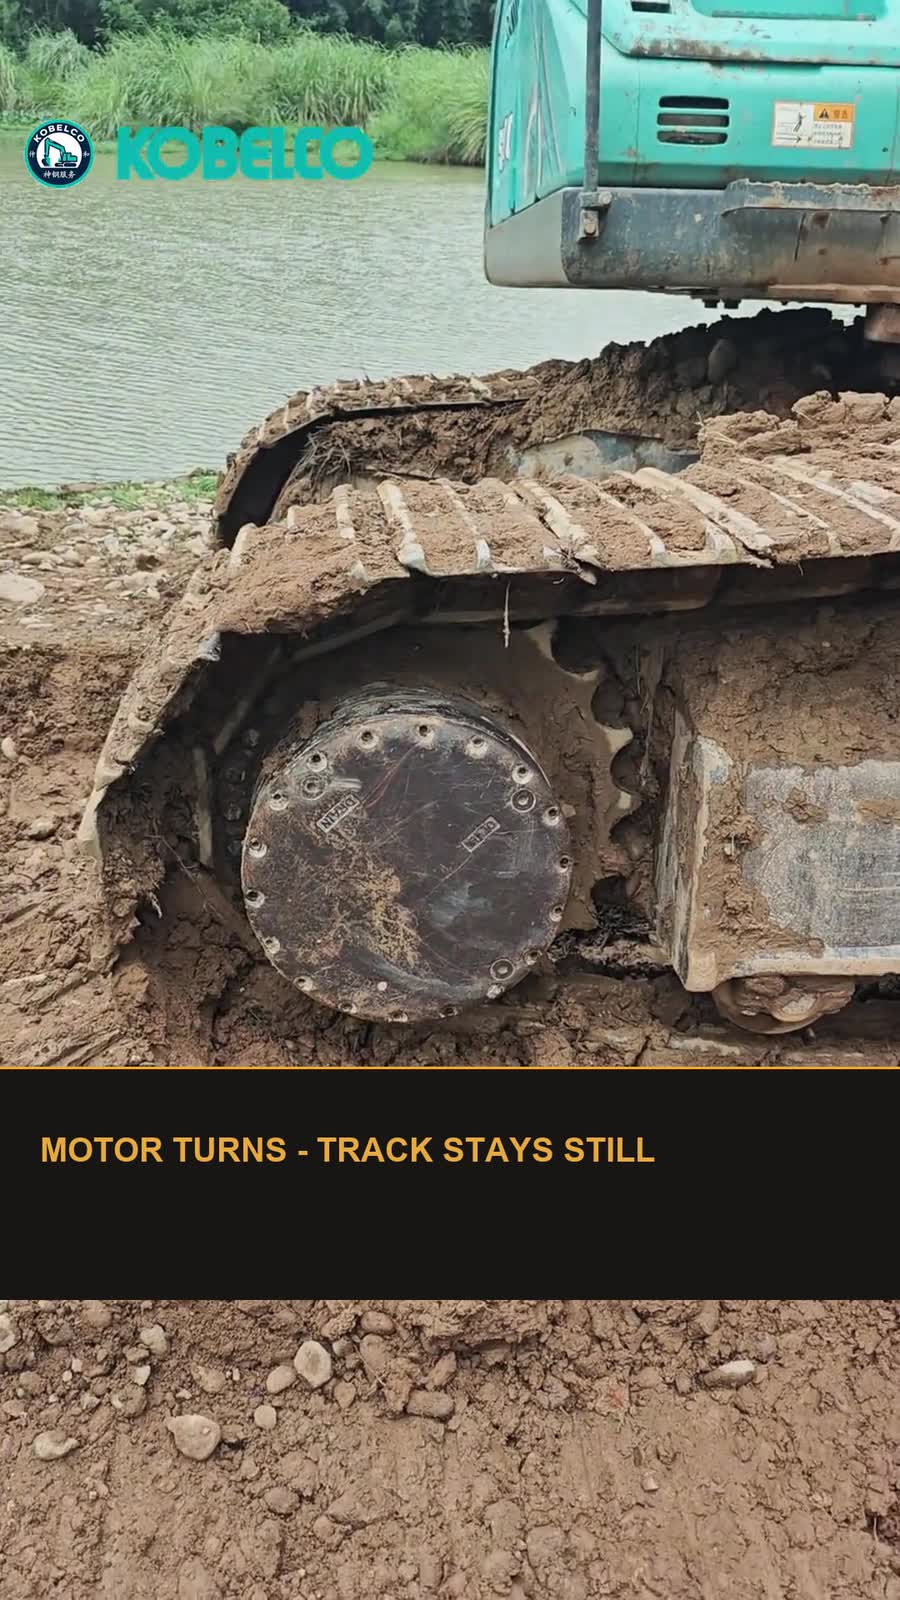
On this machine the motor spun freely in the housing while the track stayed dead. That is the signature of a disconnected drive, not a failed motor.
What that result tells you
The travel motor and the sprocket are not one piece. The motor output shaft drives a coupling on a splined connection, the coupling drives the first sun gear, and two planetary stages reduce the speed before the sprocket turns. Any break in that short chain gives you exactly this symptom.
It also tells you what you do not need to chase first. A pump, a pilot valve, a relief setting, a solenoid or a centre joint can stop oil getting to the motor. They cannot make the motor spin while the sprocket stands still. Once you have seen the motor turning, those parts have already passed the only test that matters for this particular complaint.
That is why the owner's first quote was wrong. A new motor would have been bolted onto the same stripped coupling, and the track would still not have moved.
Drain a little gear oil before ordering anything
Before the housing comes off, find the inspection and drain plugs on the final drive and take a small sample. You want to know what has been circulating through those gears.
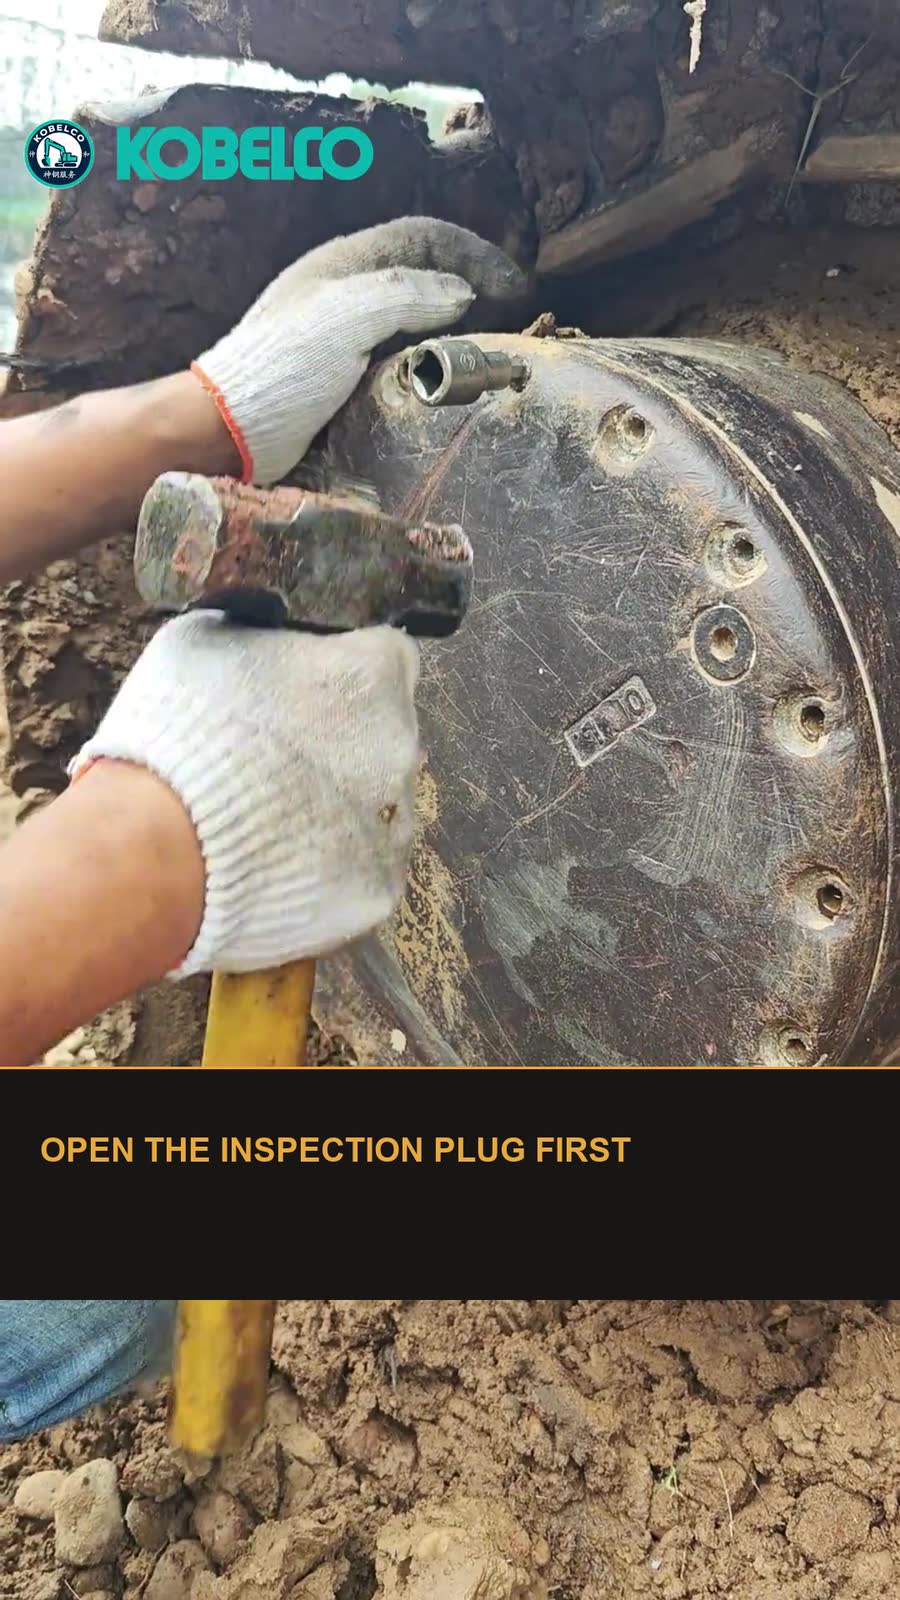
1. Clean the area around the plug thoroughly so no dirt falls in. 2. Crack the fill or supply plug first to release any pressure in the housing. A pressurised reduction unit can spray oil out of the drain port when you open it. 3. Place a clean, light-coloured container under the drain plug and let a small amount out. 4. Look at colour, thickness and what settles at the bottom. Rub a little between gloved fingers to feel for grit.
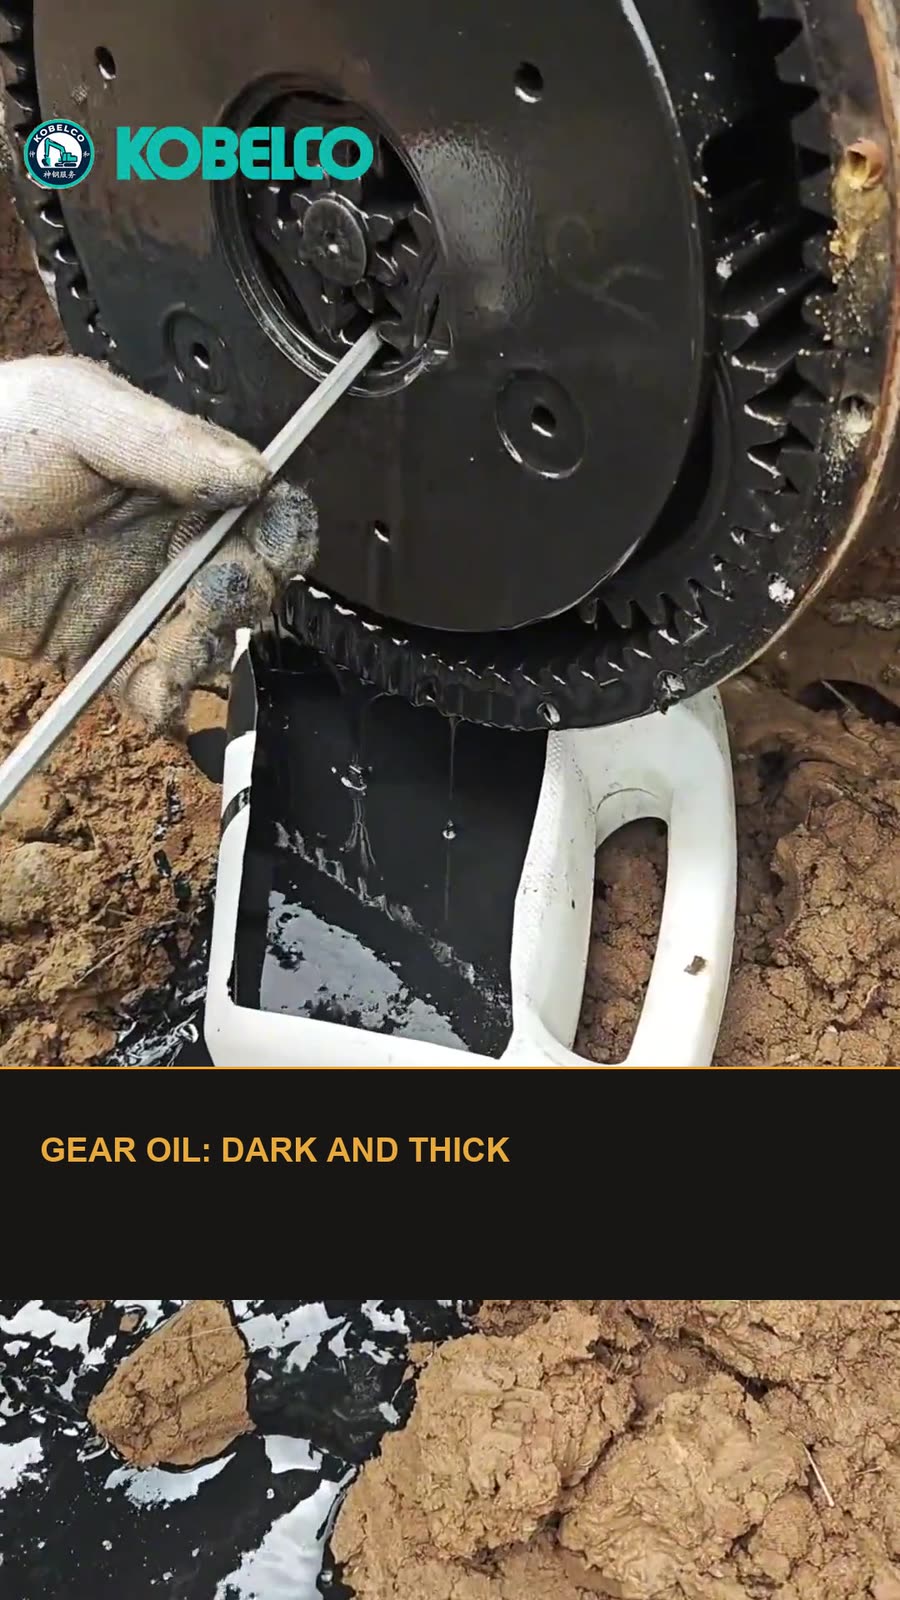
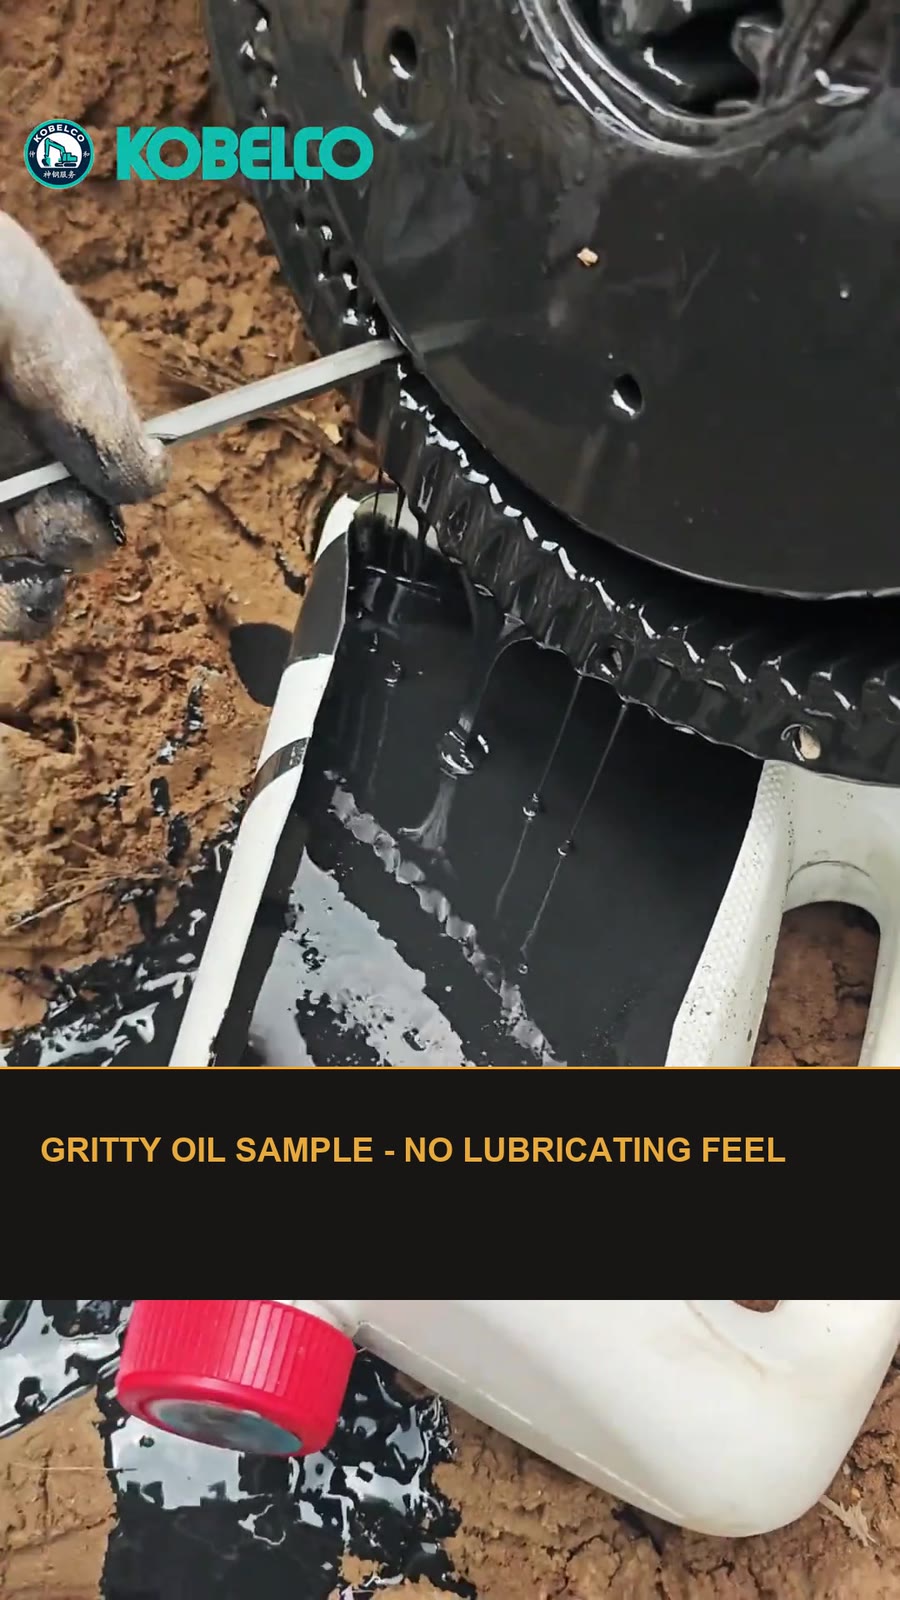
On this machine the oil came out dark and heavy, closer to paste than oil, with visible metallic fines. That is not a fluid that can protect a loaded spline. It is also the cheapest possible evidence that the housing needs to come off — and that simply bolting on a new motor would have left the cause untouched.
Check the other side at the same time. Both final drives share the same oil, the same hours and usually the same service history. A healthy sample on the left tells you the right side failed for a local reason; a bad sample on both tells you to plan a full service on both sides.
For comparison, oil-pressure complaints elsewhere in the hydraulic system are covered in low oil pressure diagnosis. Reduction gear oil is a separate, sealed circuit, so those checks do not apply here.
Open the reduction housing
With the drive drained and the machine secure, the housing can be opened.
Clean the outside of the unit completely first. Sand and mud around the hub and the floating seal area will end up inside if you skip this.
Mark the joint faces before separation so the cover goes back in the same orientation.
Support the assembly properly. A travel reduction unit is heavy, and parts coated in gear oil are very slippery.
Keep the planetary parts in order as they come out. Note which stage each sun gear and carrier came from.
Discard the plug O-rings and seals as you remove them. They are single-use parts; reusing an O-ring here is a common source of a slow leak after the repair.
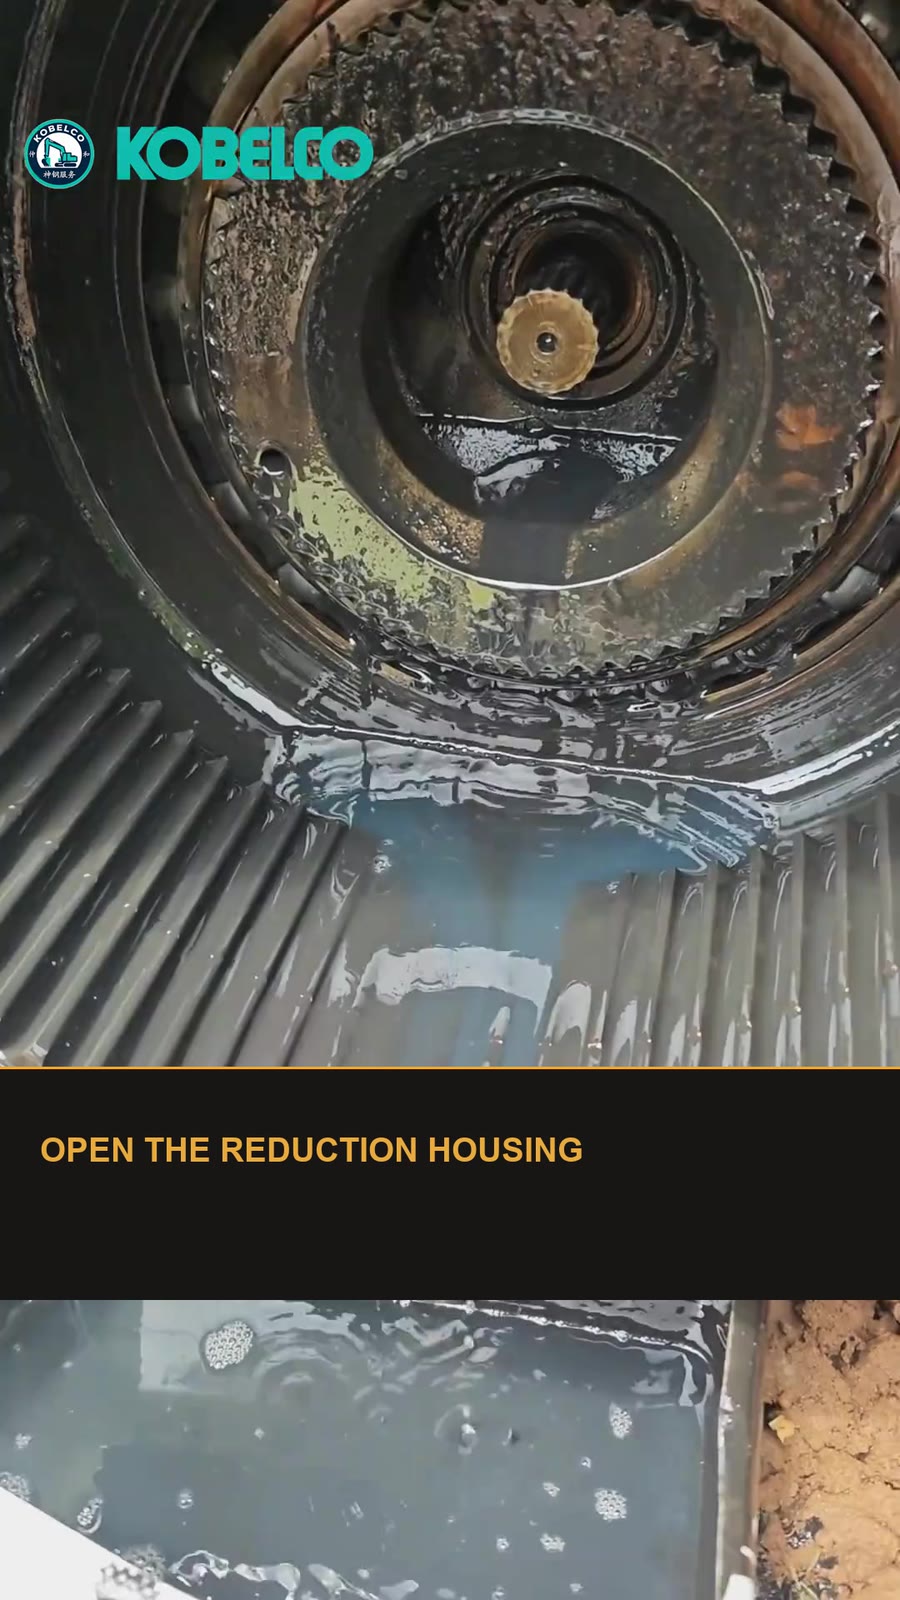
Inspect the coupling spline
Find the coupling on the motor output shaft. It is a short splined sleeve that locks the motor shaft to the first sun gear. When it is sound, the splines engage fully and torque passes straight through. When they are gone, the shaft turns inside the sleeve and nothing downstream moves.
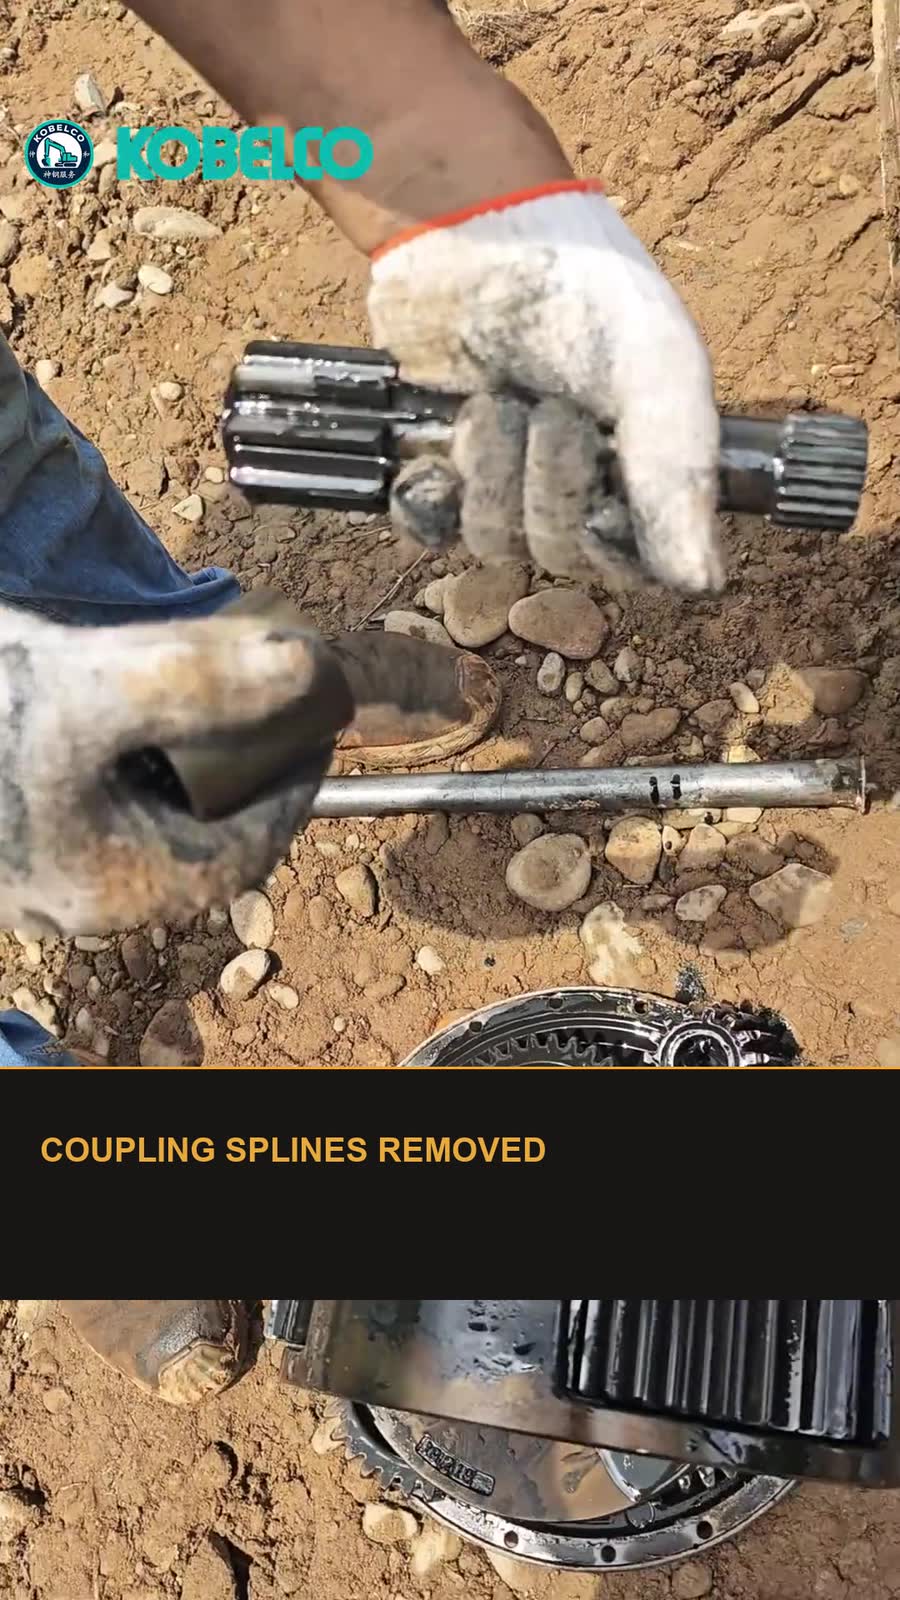
On this machine the coupling teeth were worn flat and polished. The motor shaft was rotating inside the sleeve with nothing to bite on, so no torque ever reached the reduction gears. That explains every part of the symptom: normal engine load, a spinning motor, a stationary sprocket, and no hydraulic fault code.
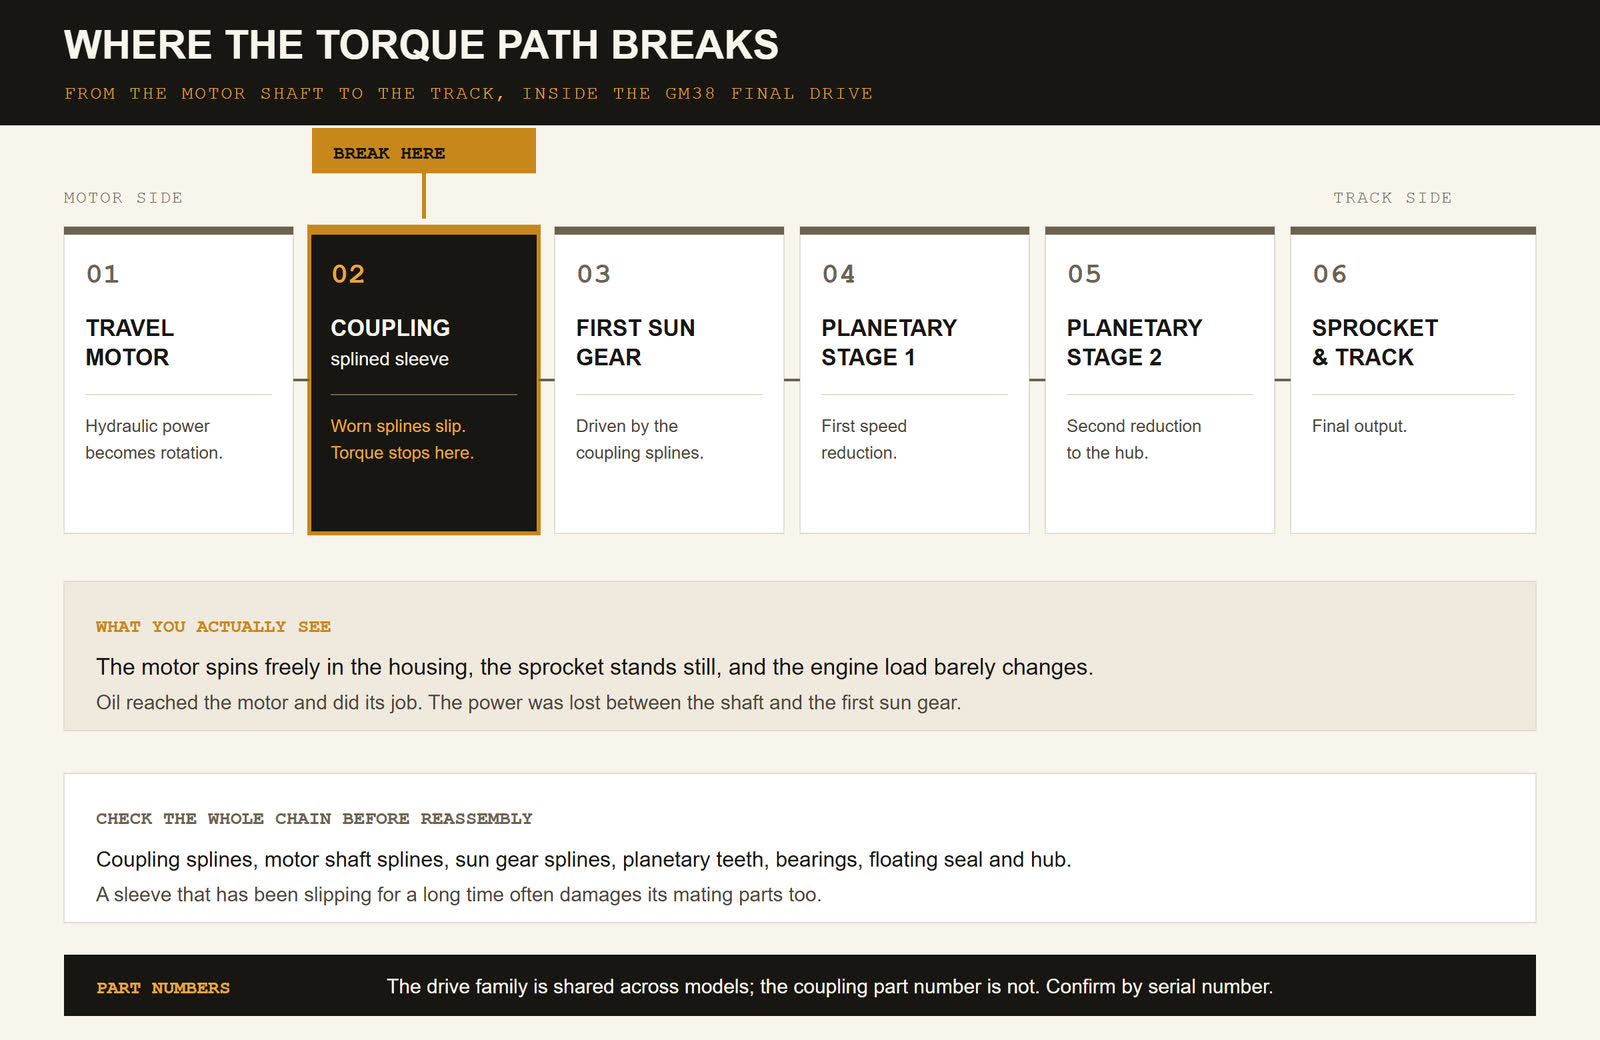
Check both halves of the connection. If the coupling splines are flat, inspect the shaft splines and the sun gear splines too. A sleeve that has been slipping for some time can damage the mating parts, and replacing only one of a worn pair will give you a short-lived repair.
Why the spline wore flat
This was not a sudden break. It was gradual abrasive wear.
Gear oil that has been in service too long oxidises, thickens and loses its film strength. Every hour of operation adds fine metal from normal gear contact. Once that sediment is suspended in degraded oil, the fluid stops being a lubricant and starts acting like a fine lapping paste. The coupling spline carries high torque through a small contact area, so it is one of the first places to lose material. As the teeth lose height, engagement becomes partial; partial engagement accelerates wear; eventually the teeth are gone and the shaft spins free.
At 14,500 hours with oil in that condition, the sequence is entirely predictable. Two things follow from it:
Replacing the coupling without dealing with the oil puts the new part back into the same abrasive bath.
The oil condition is a maintenance signal for the whole machine, not just this one drive.
What else to check while it is open
Once the housing is open, the extra inspection is nearly free. Work through it before reassembly:
| Part | What to look for | Action |
|---|---|---|
| Sun and planet gears | Pitting, chipped or missing teeth, discoloured or scored tooth faces | Replace as a matched set where the design requires it |
| Ring gear | Embedded debris, scoring, abnormal contact pattern | Clean and inspect; replace if damaged |
| Thrust washers | Discolouration, uneven wear, loss of thickness | Replace |
| Bearings | Rough rotation, noise, flaking on the race | Replace; set bearing clearance correctly on reassembly |
| Floating seal | Any scoring or uneven contact on the faces | Replace as a matched pair, never one side only |
| O-rings and oil seals | Any removal at all | Replace all; they are not reusable |
| Housing interior | Metal fines, sludge, blocked oil passages | Flush thoroughly before filling |
Any of these left unchecked can undo the repair within a few hundred hours. A fresh coupling running against pitted gears in dirty oil simply wears out again.
The repair order that actually holds
Do the work in this order. Skipping the cleaning steps is the reason this fault comes back.
1. Replace the coupling. Fit the correct part for the model, serial number and side. Inspect the shaft and sun gear splines and replace them too if they are worn. 2. Clean everything. Flush the housing, the gears, the oil passages and the cover joint faces. Remove all old oil and metallic sediment. Do not leave cleaning solvent behind. 3. Replace the seals. New floating seal pair, new O-rings on the plugs, new oil seals. Lightly lubricate seal faces on assembly. 4. Reassemble with the alignment marks matched. Tighten fasteners to the values specified for your machine, and set bearing clearance where the design calls for it. 5. Refill with the correct gear oil to the specified level. Use the level plug, not a guess. See the next section for the grade and quantity question. 6. Run it in gently. With the track still raised, run at low idle for a few minutes in both directions, then check for leaks and unusual noise. 7. Recheck the level after the first run and top up if needed. 8. Test under load on level ground, both directions, and compare the two sides.
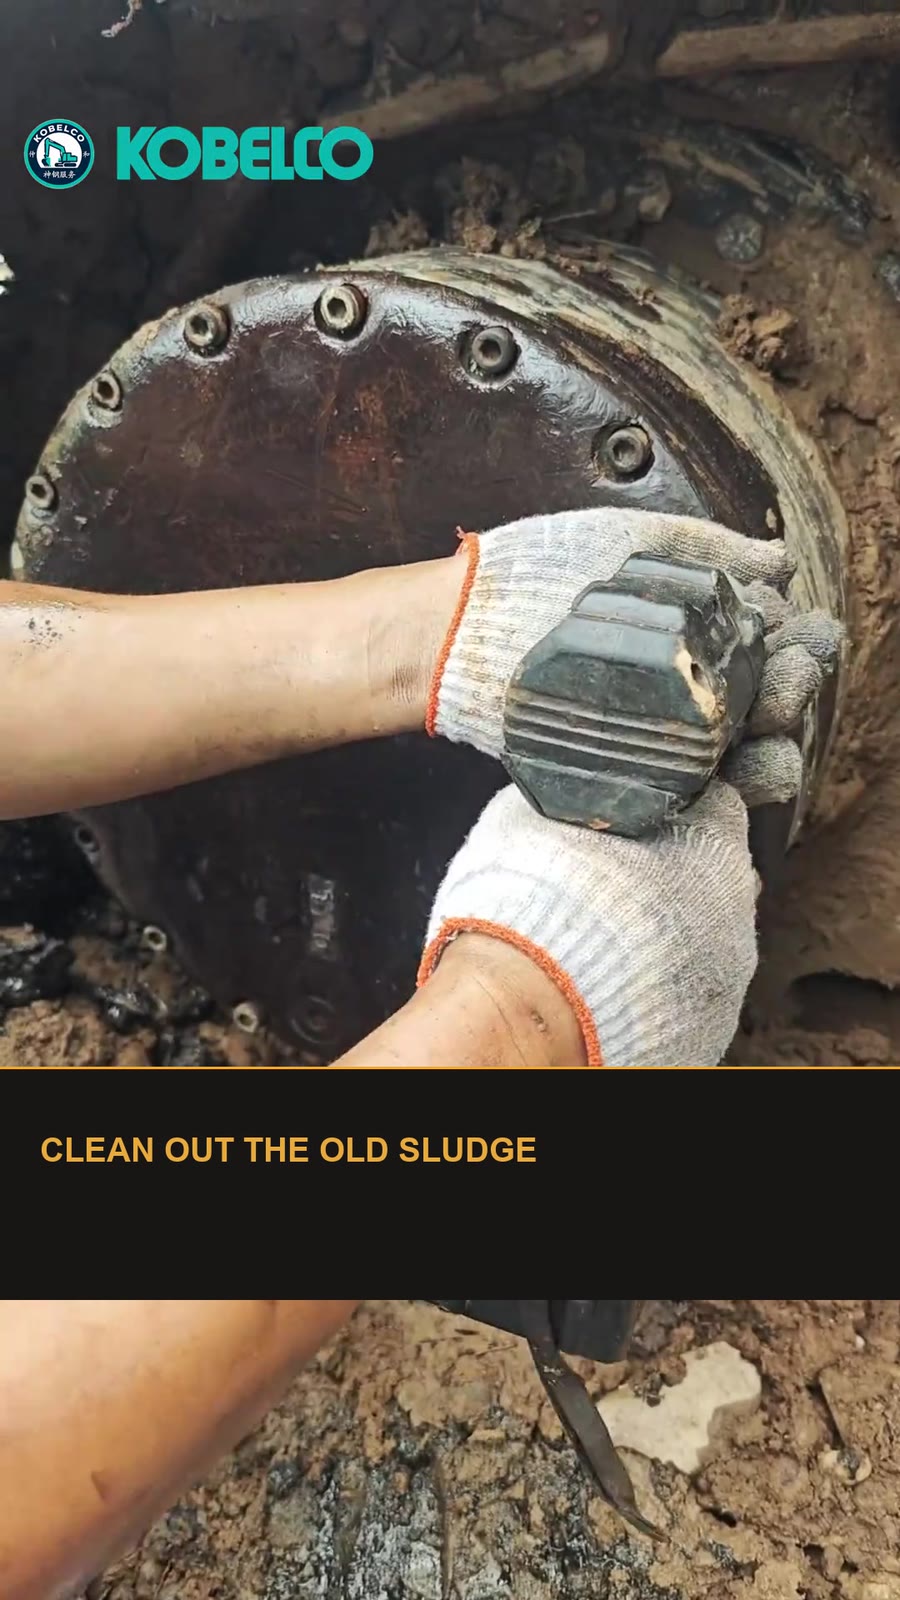
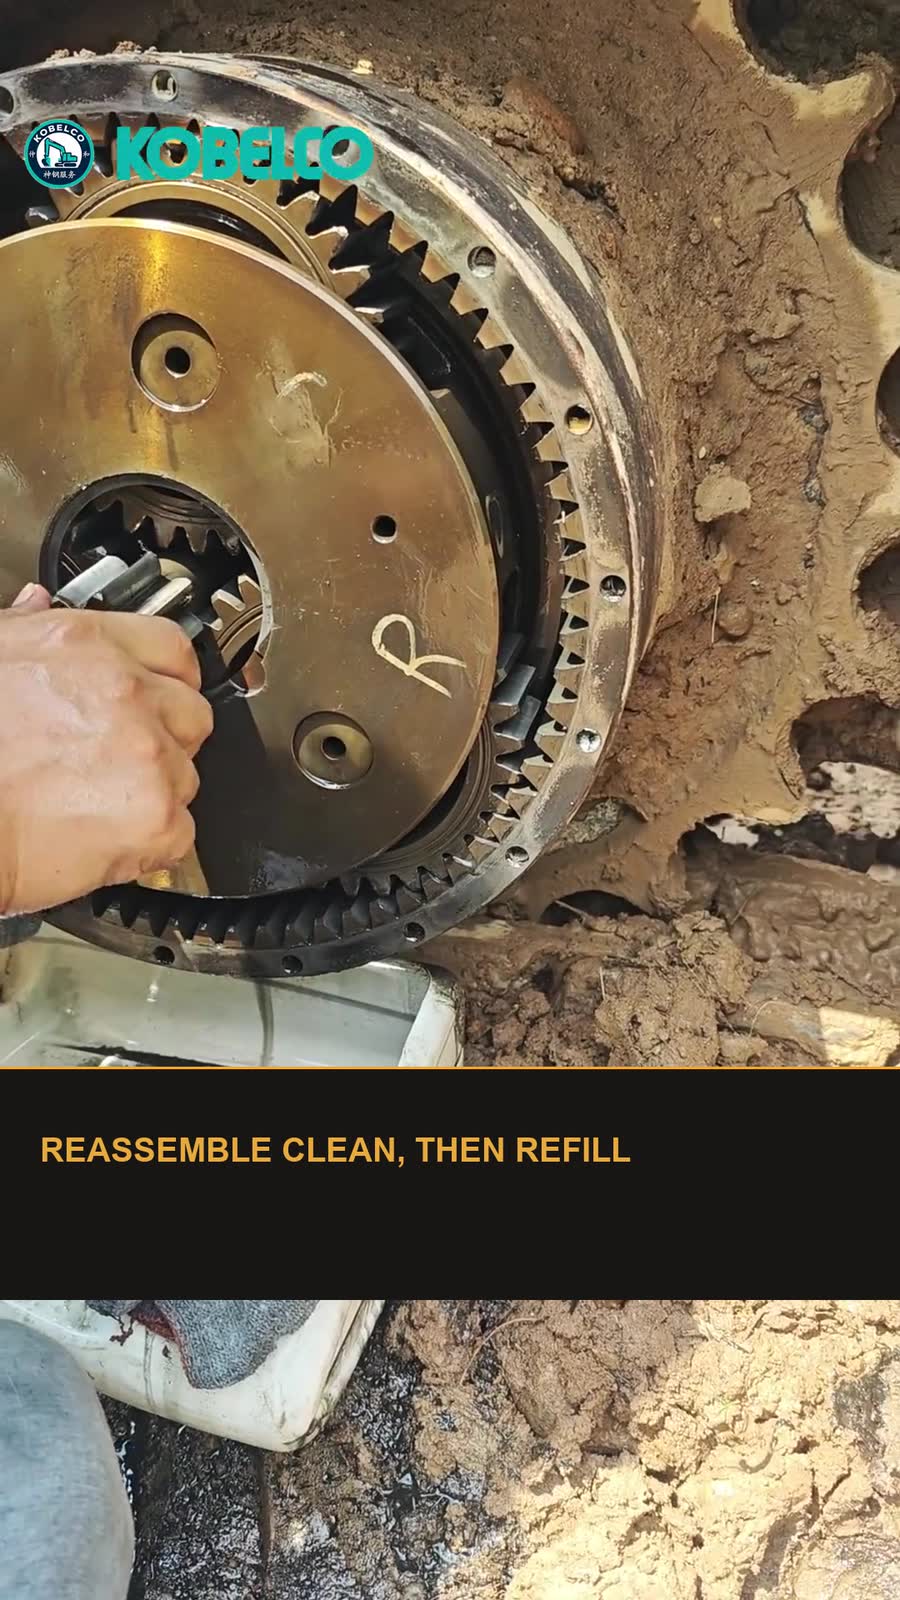
On this machine the repair was a coupling, a thorough clean, fresh oil and a test run. The track worked normally and the original travel motor stayed in place.
Gear oil: grade, level and change timing
Three practical questions come up every time, and the answers are deliberately conservative.
Which grade? Use the gear oil grade specified in the manual for your machine and serial number, and the quantity that brings the level to the level plug. Do not carry a grade or a fill volume across from a different model, even when the two machines use the same final drive family. Do not use hydraulic oil in a reduction housing, and do not top up an unknown old fill with a different product.
When should it be changed? Follow the interval in your machine's manual as the baseline, then let the oil's condition decide. Every planned service is a good time to crack the inspection plug and look at a small sample:
Golden and free-flowing: leave it, record what you saw.
Dark, thick, burnt-smelling, milky, or carrying visible metallic fines: change it now, on both sides, and look for the cause rather than waiting for the next scheduled interval.
Any sudden change from the last check: investigate before the machine goes back to full duty.
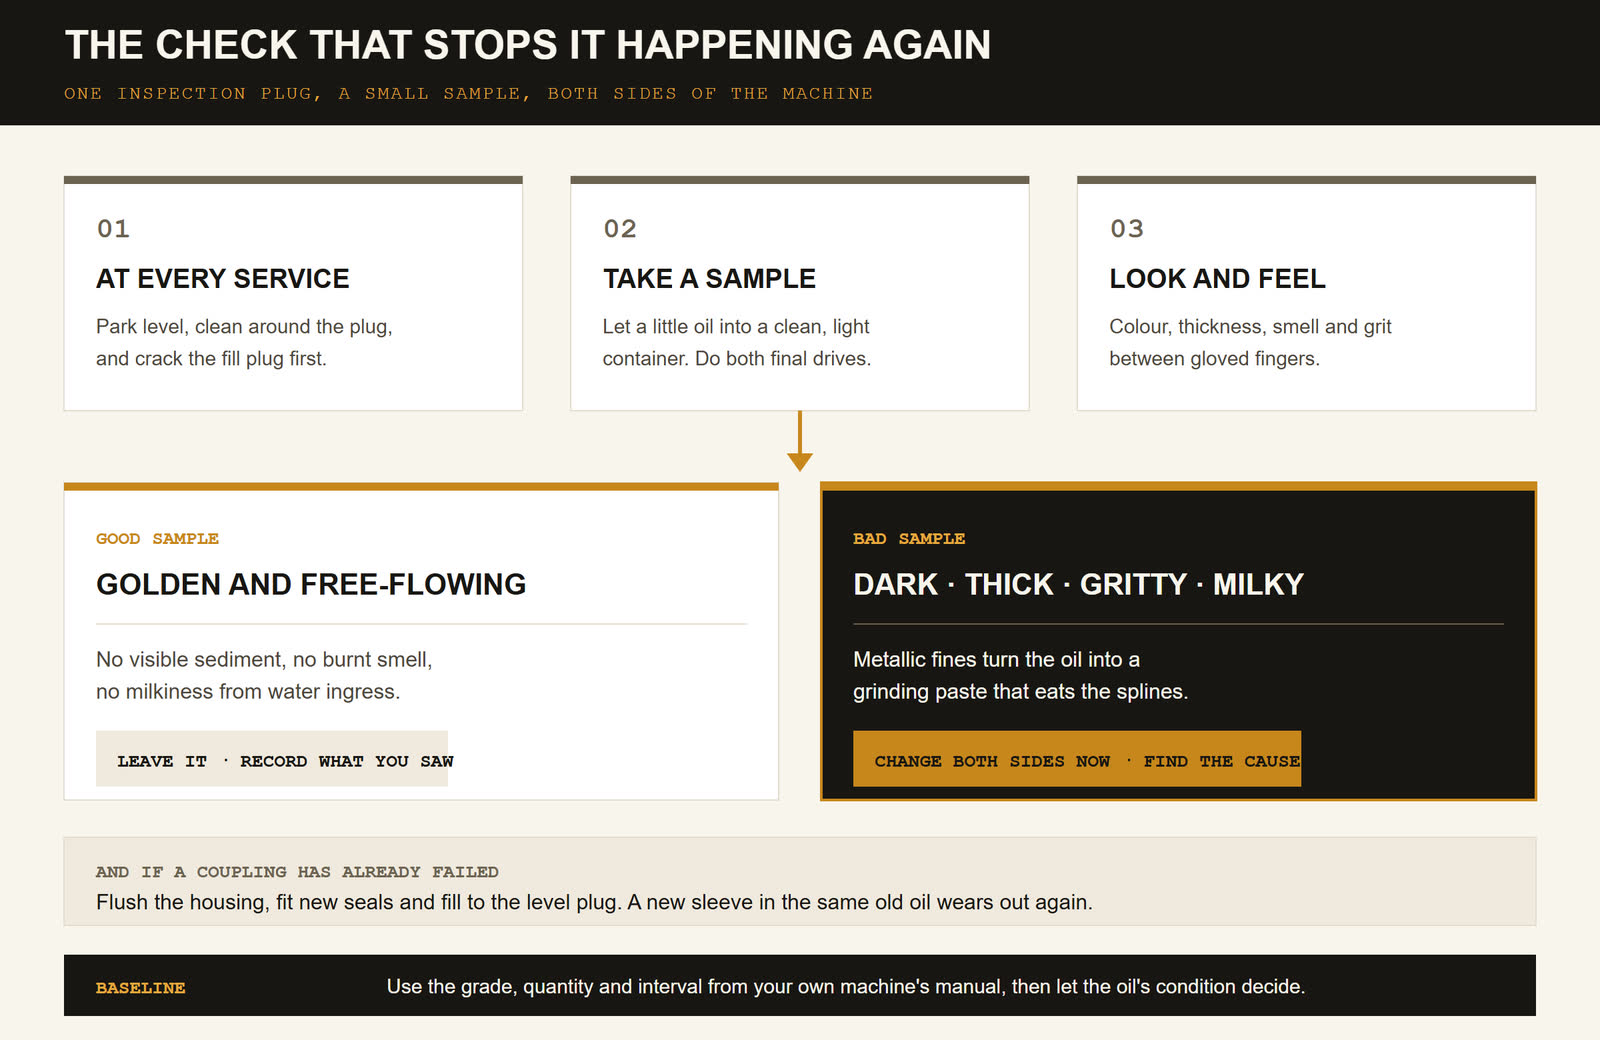
The natural follow-up question is how many hours final drive gear oil should last. There is no single interval that fits every machine: it depends on the duty cycle, operating temperature, contamination, water ingress and whether the earlier changes actually happened. A well-maintained machine at 14,500 hours does not normally produce oil like this. The reliable rule is to check the oil rather than trust the hour meter, and to change it when it tells you to.
Keep your wider service supplies in one order — filter kits and breathers are worth checking at the same visit, since a blocked breather can push contamination and pressure into sealed housings.
Order the coupling, not the whole drive
The cheapest mistake on this fault is ordering a complete final drive assembly when one worn sleeve caused it. The second most expensive is ordering a coupling that does not fit your serial number.
Before you order, have these ready:
Model and full serial number from the machine plate.
Which side failed, left or right.
A photo of the old coupling, both ends, showing the spline count and shape.
A photo of the shaft and sun gear splines.
The hour meter reading and a sample photo of the oil.
An assembly number for a complete final drive is not the part number of the coupling inside it. The GM38 drive is used across SK200-8, SK210-8, SK200-10 and SK210-10, but the sales part numbers differ between those machines and between build versions. Confirm the individual part by serial number before payment.
Browse the GM38 final drive listing for the assembly and the final drive category for gears, bearings, plates and seal sets. If what you need is an internal coupling or repair kit rather than a complete unit, ask with the photos above so the right part is picked the first time.
If the track still will not move
If you have replaced the coupling, cleaned the housing, refilled correctly and the sprocket still does not turn, the break is elsewhere. Go back to the first test and be honest about what you actually saw:
Motor does not turn: work the hydraulic and electrical side. The travel deviation checks, travel weakness guide, oil pressure troubleshooting and the -10 fault code guide are the right starting points.
Nothing moves at all, on either side: that is a whole-machine problem, not a final drive problem. See the no-instrument beep test and the four-check no-movement guide.
Motor turns, sprocket does not, coupling is new: recheck the shaft and sun gear splines, the planetary stages and the sprocket hub connection. A second break in the same chain is possible after a long period of slipping.
Frequently asked questions
Can a failed travel motor stop just one track?
It can, but it is not the usual outcome when everything else on the machine works normally. The useful question is whether the motor itself turns. If you lift the side and see the motor rotating while the sprocket stays still, the motor is doing its job and the fault is downstream. If the motor does not turn, look at pilot supply, the travel valve section, relief settings and the motor itself.
How can I tell the coupling is stripped without opening the housing?
You cannot confirm it visually, but you can get very close. A motor that spins while the track stays still means the torque path between shaft and sprocket is broken, and a coupling worn flat is the most common reason. Dark, thick oil with metallic fines at the inspection plug makes it much more likely. Opening the housing is what turns that strong suspicion into a confirmed repair.
Do I need to replace the whole final drive?
Usually not. In this case one coupling, a full clean, fresh seals and fresh oil restored normal travel and saved the original motor. Replace the whole assembly when the ring gear, planetary gears, hub or bearings are damaged beyond their service limits, or when a complete unit is cheaper than the parts and labour for your market. Decide after the housing is open, not before.
Will fresh gear oil fix a track that will not move?
No. Once the splines are worn flat, oil cannot restore the missing metal. Fresh oil prevents the next coupling from wearing the same way, which is why it belongs in the same repair, but the coupling has to be replaced.
Does this apply to my SK200-8 or SK210-10?
The mechanical layout does. The GM38 final drive family is used across SK200-8, SK210-8, SK200-10 and SK210-10, and the checks in this guide — lift the side, watch the motor and sprocket, sample the oil, inspect the coupling, clean and refill — are the same. The part numbers, oil grade, fill quantity and any hydraulic pressure specifications are machine-specific, so confirm those against your own model and serial number.
How often should final drive gear oil be changed?
Use the interval in your machine's manual as the baseline and check the oil at every service. Colour, thickness and metallic fines tell you more than the hour meter. Dark, thick or gritty oil should be changed immediately, on both sides, along with finding out why it degraded. Duty cycle, heat, water ingress and missed earlier services all shorten the useful life of the fill.
Can I keep working with one track out?
No. Continuing to run the machine with slipping splines and metal-laden oil grinds the shaft, sun gear and planetary set, turns a one-part repair into a full unit replacement, and puts load on the good side. Park it, sample the oil and open the housing.
Not sure which final drive or coupling fits your machine?
Send the model, serial number, hour meter reading and photos of the nameplate and the old coupling. Our engineers confirm the part list before quoting.
Request a part number check