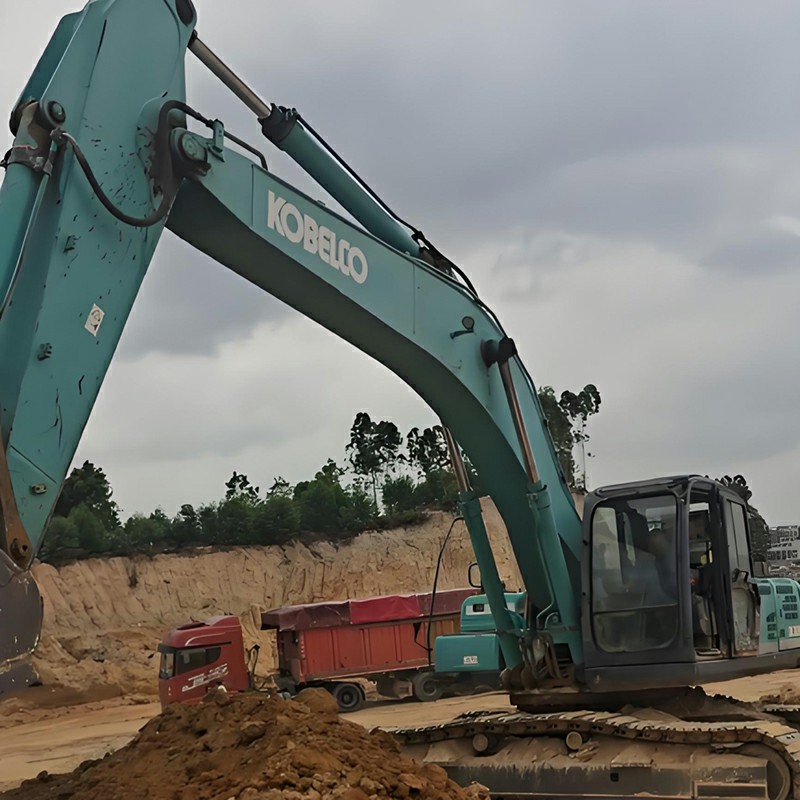
Kobelco Excavator Engine High Temperature Troubleshooting Guide
Overview & Quick Summary of 8 Key Inspection Points: Engine overheating in Kobelco excavators is a common issue. To systematically resolve it, operators should check the following 8 core areas:
1. Fan & AC Belt Tension; 2. Radiator Cap; 3. Thermostat Operation; 4. Radiator Core Blockage; 5. Water Pump Function & Leaks; 6. EGR Cooler; 7. Cylinder Head Gasket; 8. Diesel Fuel Pump / SCV Valve.
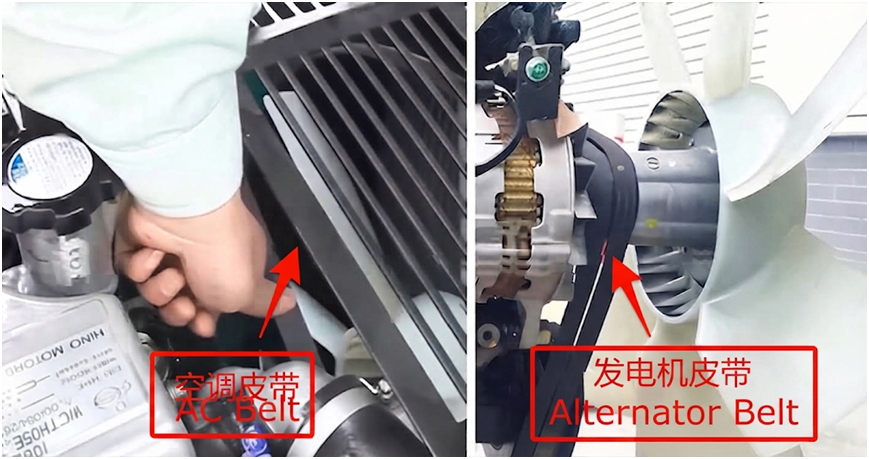
1. Fan Belt & AC Belt Tension Inspection and Adjustment
How to check belt tension: Turn off the engine first, then press the middle of the belt with your thumb. If the deflection falls within the specified range, it is normal (1N = 0.102KG). Insufficient tension causes easy slipping; excessive tension damages bearings.
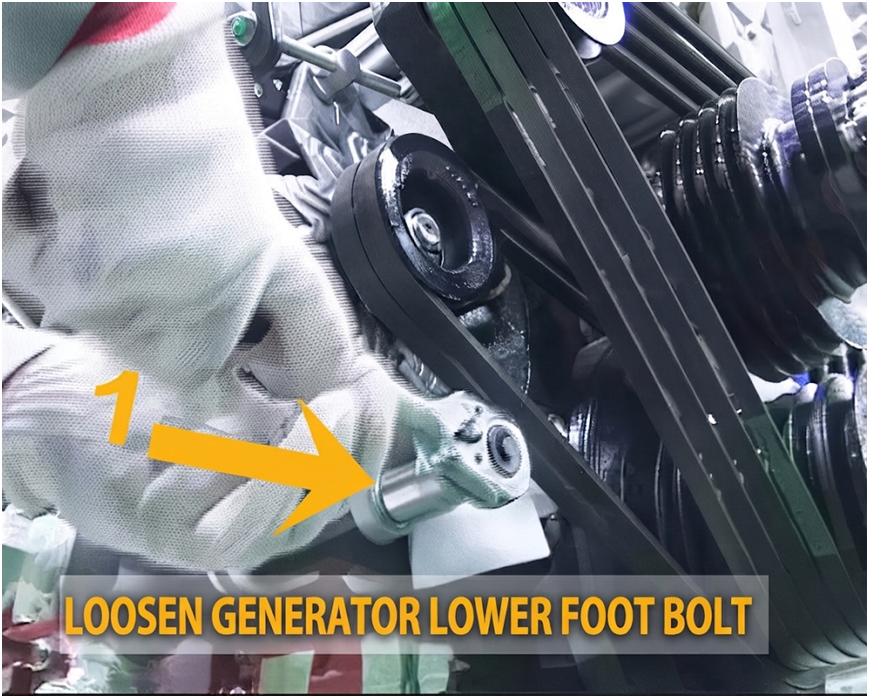
Fan Belt Adjustment Steps:
Step 1: Open the engine hood, and loosen the mounting nuts and adjusting nuts.
Step 2: Loosen the adjusting bolt, adjust the alternator belt to the specified tension, and then tighten the mounting and adjusting nuts.
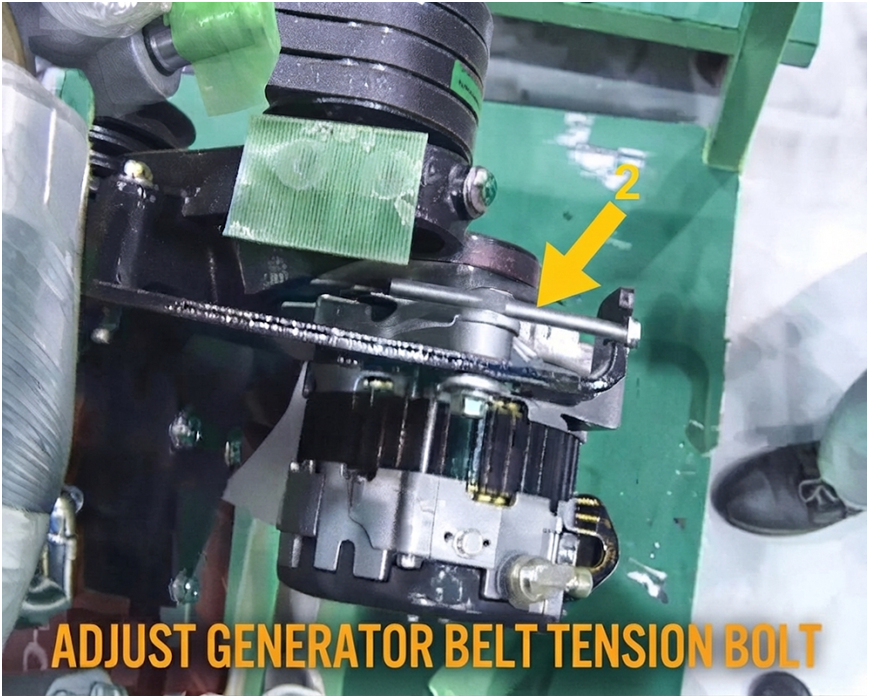
(Tightening torque: bolts 83 N·m, fixing nuts 51 N·m).
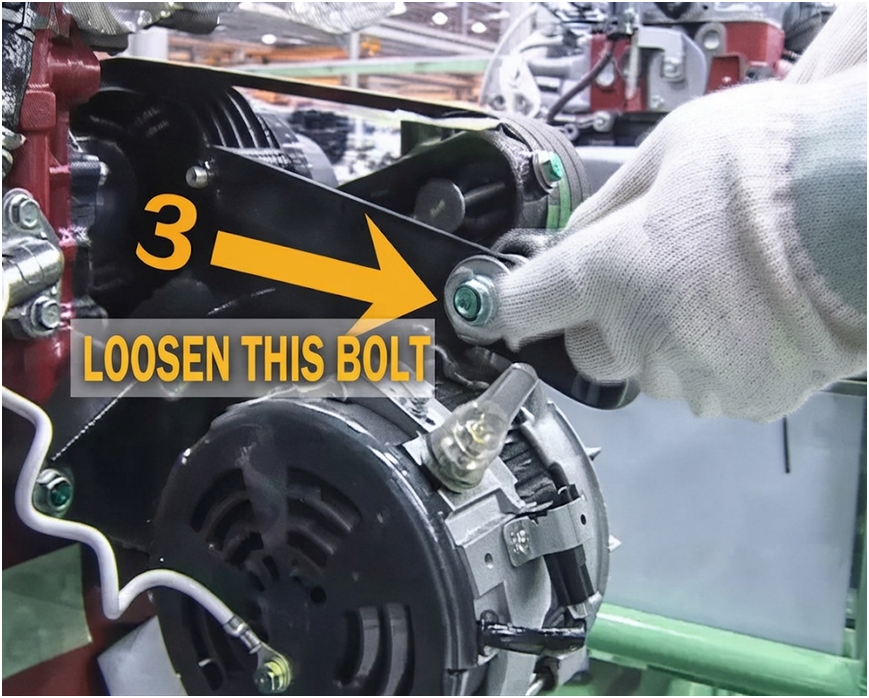
Step 3: Loosen the mounting nut and adjusting bolt, adjust the fan belt to the specified tension, and tighten the nuts. Run the engine at low idle for 5 minutes after adjustment and re-check the tension.
AC Belt Adjustment Steps:
Step 1: Slightly loosen the idler pulley nut, turn the adjustment bolt to set the belt tension, and tighten the nut (Tightening torque: 46.1 ± 4.9 N·m).
Step 2: Run the engine at low speed for about 5 minutes, then re-check the belt tension.
An aged radiator cap or a low-quality aftermarket cap results in poor sealing, leading to air leakage, coolant loss, and low water levels.
3. Thermostat Inspection & Replacement
Method 1: Open the radiator cap, start the engine, and check if the coolant in the radiator is flowing. Flowing indicates normal circulation; non-flowing indicates the thermostat failed to open.
Method 2: Heat the thermostat in water. Measure the temperature when the valve starts to open and when it fully opens, and check the lift amount.
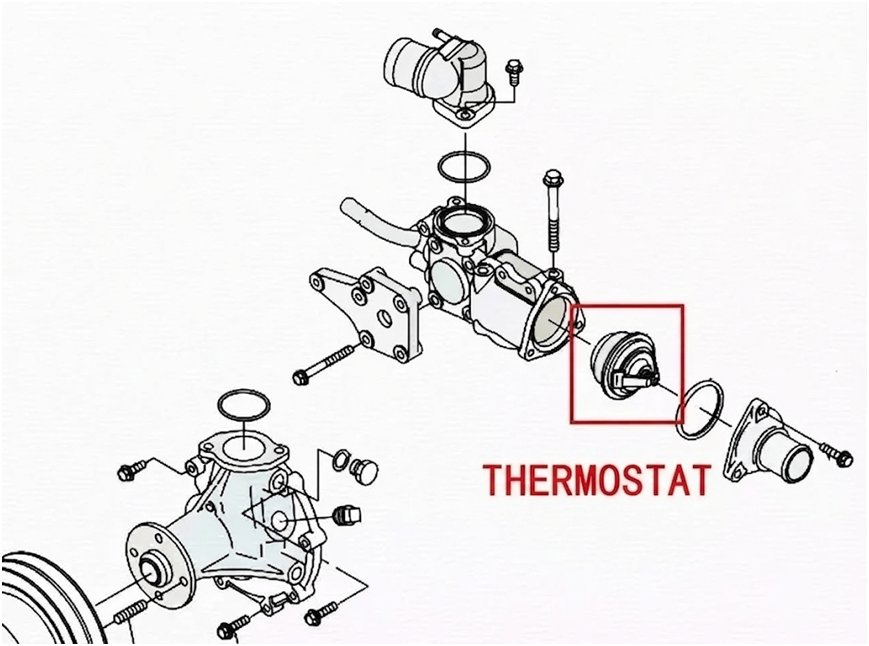
Thermostat Replacement Steps:
1. Remove the EGR cooler, loosen bolts, take off the thermostat housing, and remove the O-ring from the groove above the cooling pump.
2.
Installation:- Clean dirt off the contact surfaces of the thermostat housing and cylinder head using a scraper.
- Apply liquid sealant to the thermostat housing as specified.
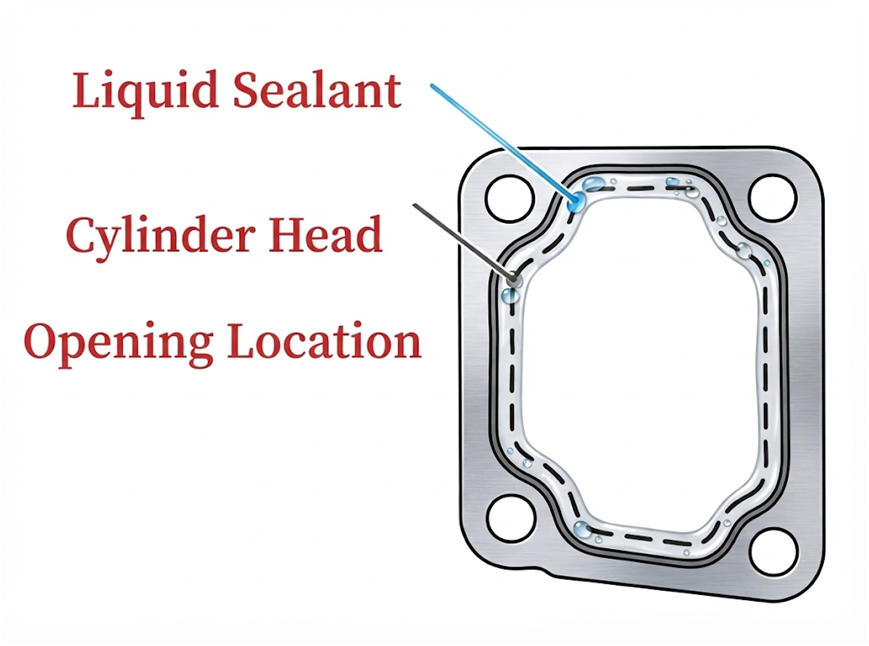
- 20 minutes after applying sealant, install a new O-ring into the groove above the cooling pump.
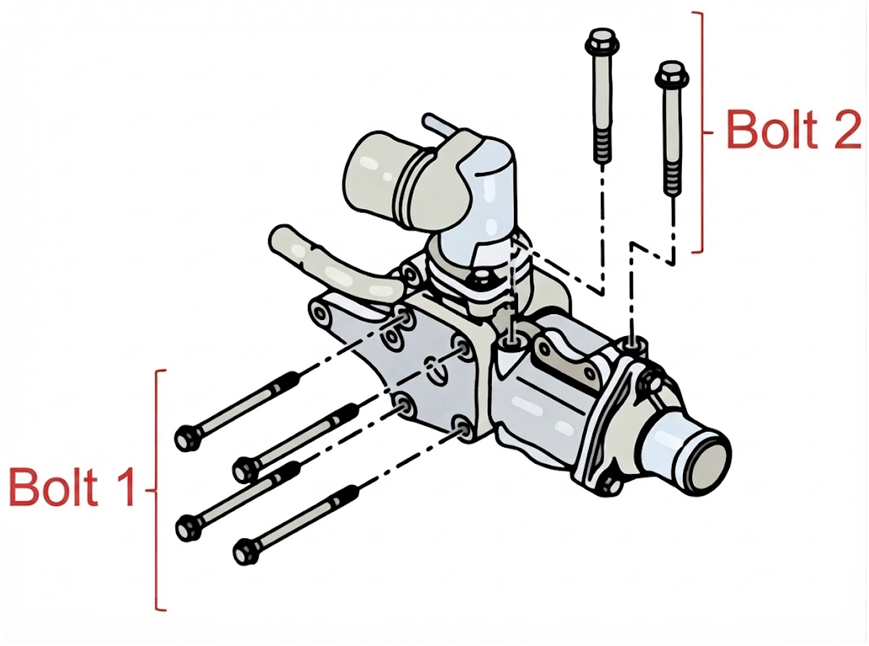
- Insert thermostat mounting bolts through the housing, install the thermostat, and tighten cylinder head bolts (Bolt 1) and cooling pump mounting bolts (Bolt 2) sequentially.
4. Radiator Core Inspection
Check if
the Water Tank Radiator core is blocked. Clean oil and debris using an air compressor or water gun (control the pressure carefully to avoid damaging the cooling fins). Check if the sealing sponges on both sides are missing or leaking air; add sealing sponges if necessary. Check water channel flow; use radiator descaler if clogged.
Remove the thermostat, start the engine, run it repeatedly at idle and high speeds, and squeeze the water hose to check if water is flowing and if the hose feels firm (indicating proper pressure). Open the radiator cap to observe the coolant flow speed.
If the water pump leaks: Open the top cover, remove the fan water seal ring, check the inner side of the water pump belt, and open the oil pan bottom plate to confirm the leak source (e.g., damaged water pump oil seal or gasket). Replace directly if damaged.
If the water pump cannot drain: Open the drain switch at the bottom of the radiator, or open the yellow drain plug on the engine cylinder block.
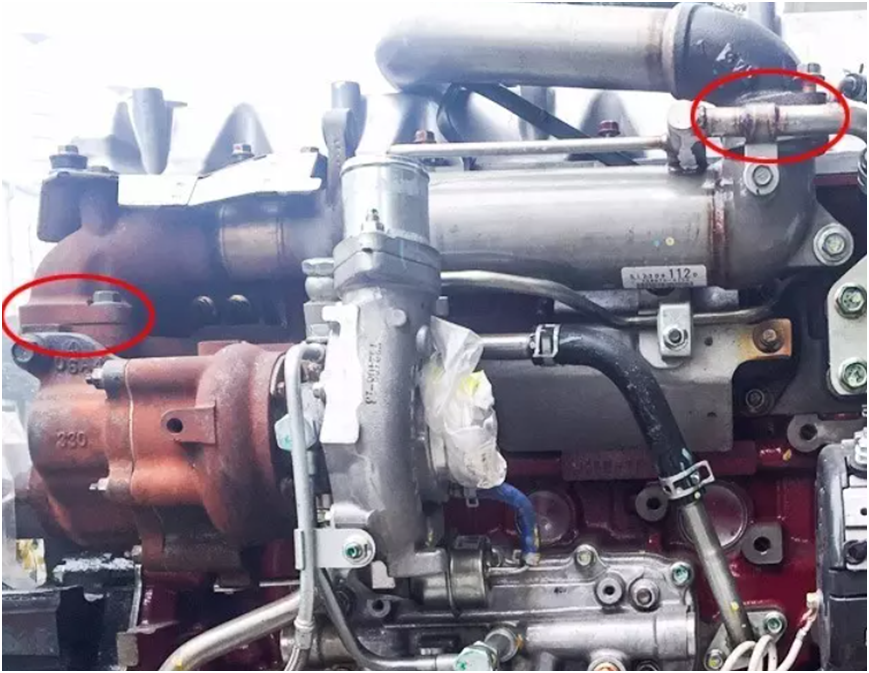
6. EGR Cooler
A damaged EGR cooler reduces cooling performance and raises exhaust gas recirculation temperatures into the combustion chamber. Check for water leakage inside the cooler pipes (leakage indicates a damaged cooler).
7. Cylinder Head Gasket
Check for a blown
cylinder head gasket: Open the radiator cap with a cold engine, start the engine, and observe. If excessive bubbles appear accompanied by hot steam escaping from the radiator port, the cylinder head gasket is damaged.
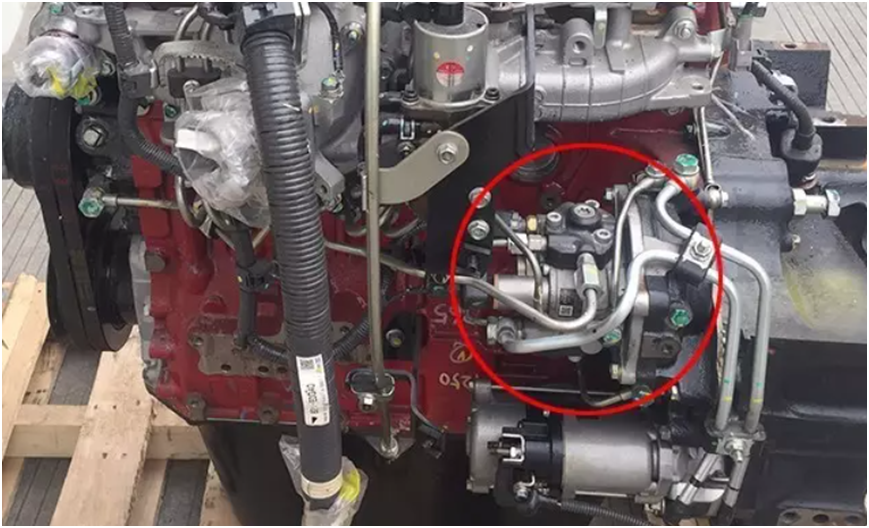
Use a circuit tester to measure the resistance between the SCV valve and fuel temperature sensor terminals. If the resistance value exceeds standard specs, the fuel pump is worn and requires replacement.
Abstract: Excessive engine temperature has long been one of the most frustrating problems for many excavator owners. When faced with this situation, most people choose to immediately contact a mechanic to replace the relevant parts in order to resolve the issue quickly and stay on schedule. However, the top five issues listed above are all very easy to resolve; as explained in the article, these problems can be easily fixed.